No products in the cart.
There are several ways to perform an extraction from the Windows Registry, let’s see some of the most useful.
This excerpt comes from our Windows Registry and Log Analysis online course by Luca Cadonici.
On a running machine, you can perform a backup of the registry using the Windows Graphical Interface or using the command shell or PowerShell. In the first way, just launch the regedit command in the cmd shell to open the graphical version of the registry.
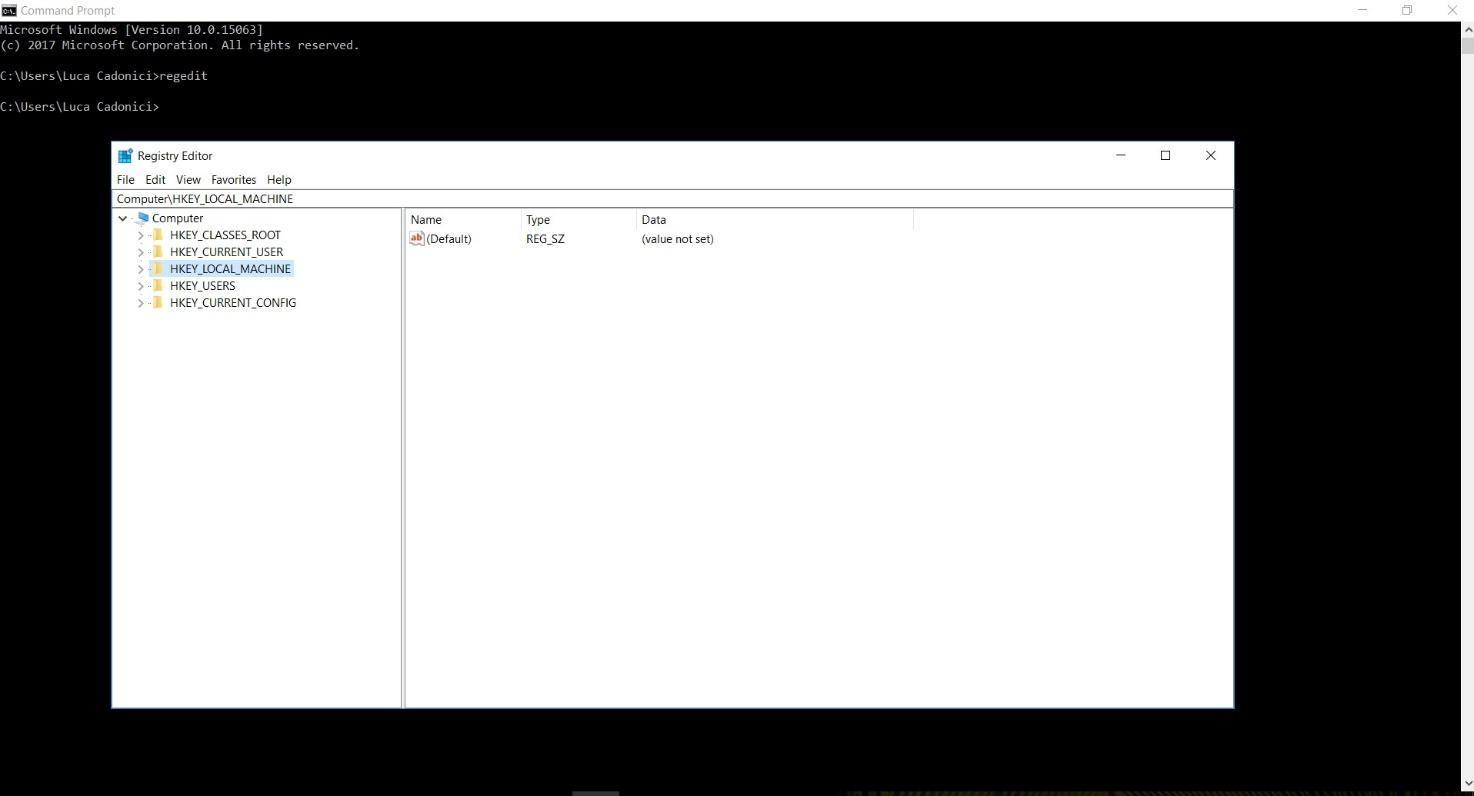
Figure 2.4.1
To export the entire registry right-click on the computer icon and select “export” to save a .reg file in a folder of your choice.
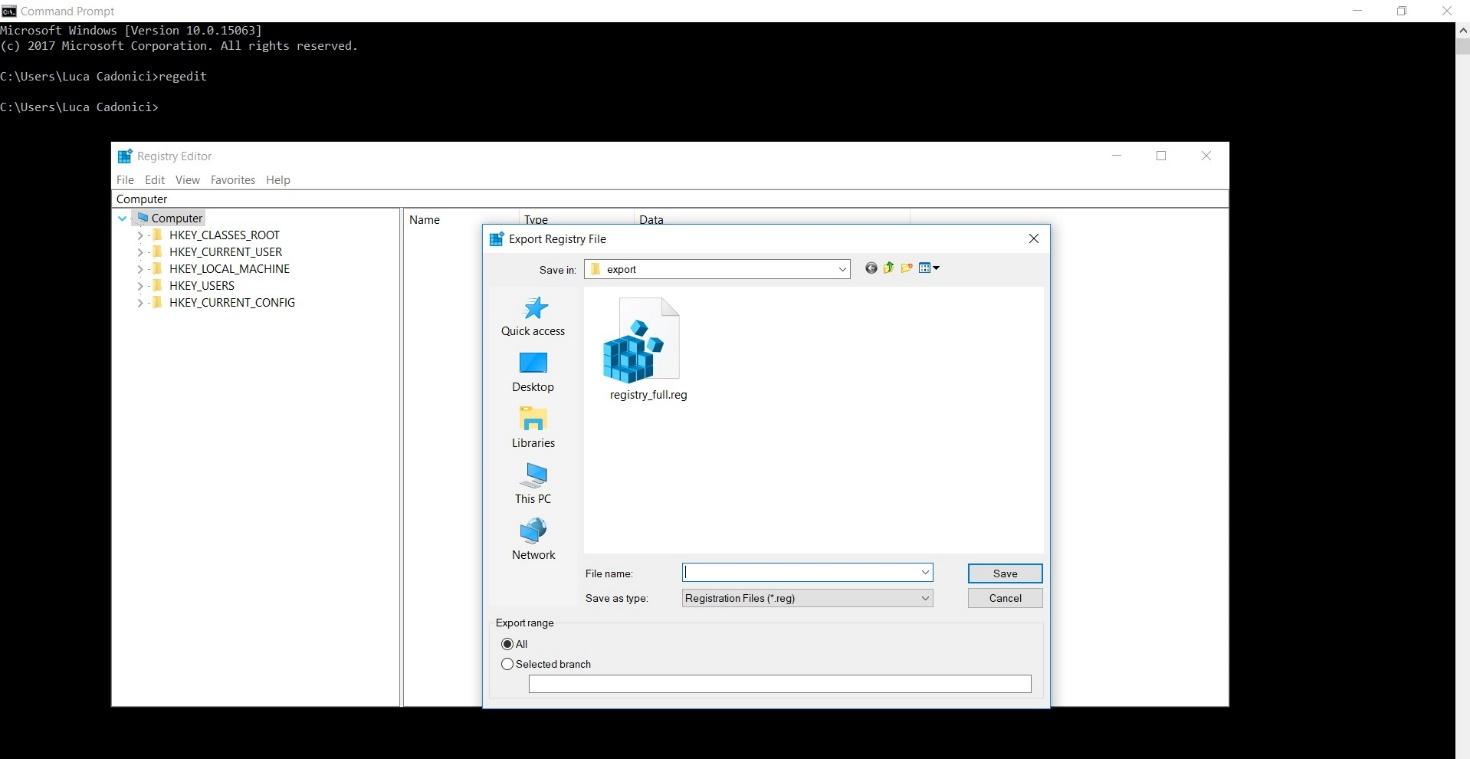
Figure 2.4.2
To export a single item, just expand or collapse the keys until you find the one you need. Note that at the bottom of the window, the export range for the selected branch is shown.
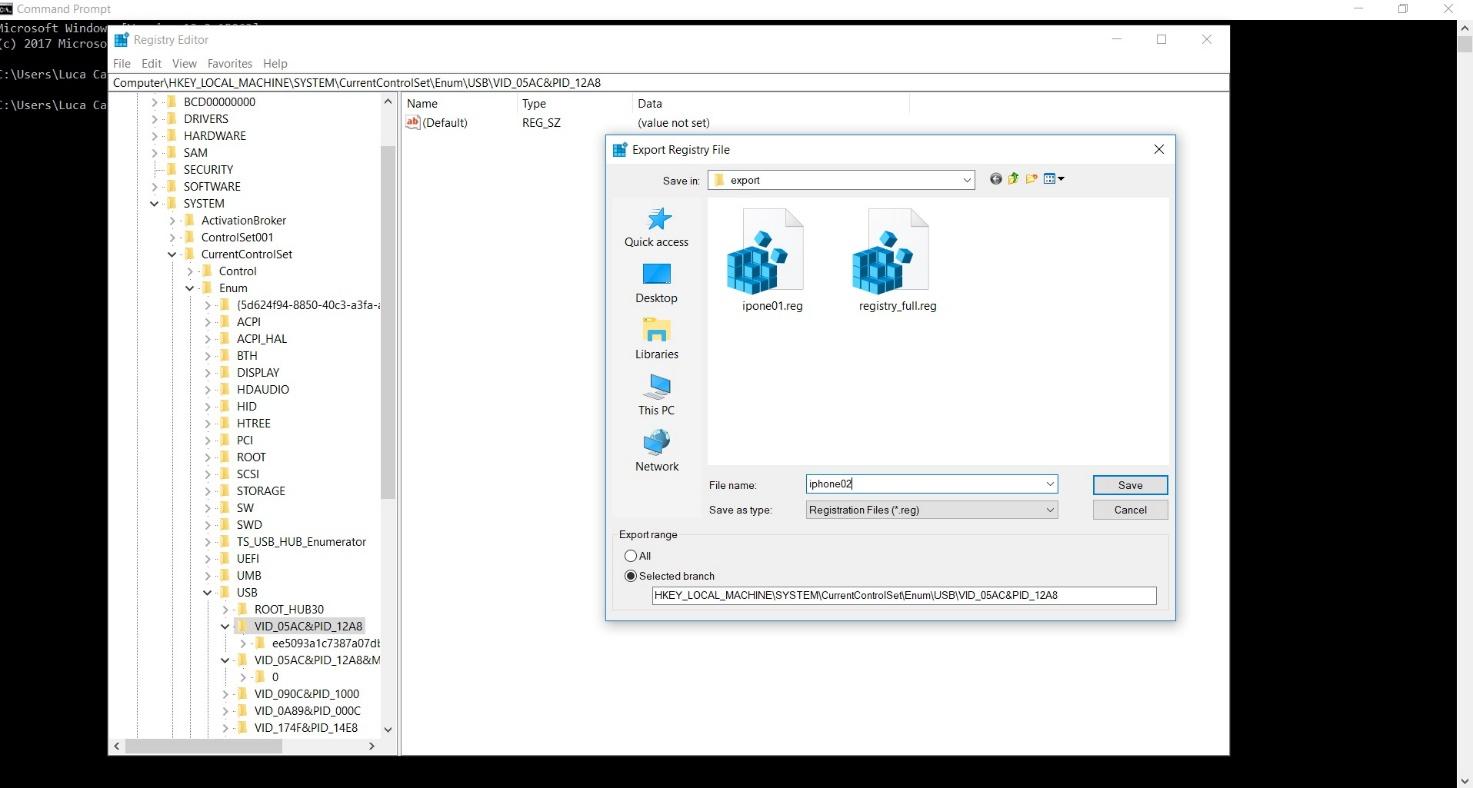
Figure 2.4.3
You can do the same from PowerShell using the following syntax:
reg export [PATH TO KEY] [DESTINATION FOLDER] [FILE NAME.reg]
e.g. reg export HKLM\Software E:\export\software.reg will export software key and its subkeys to the folder E:\export creating a file named software.reg
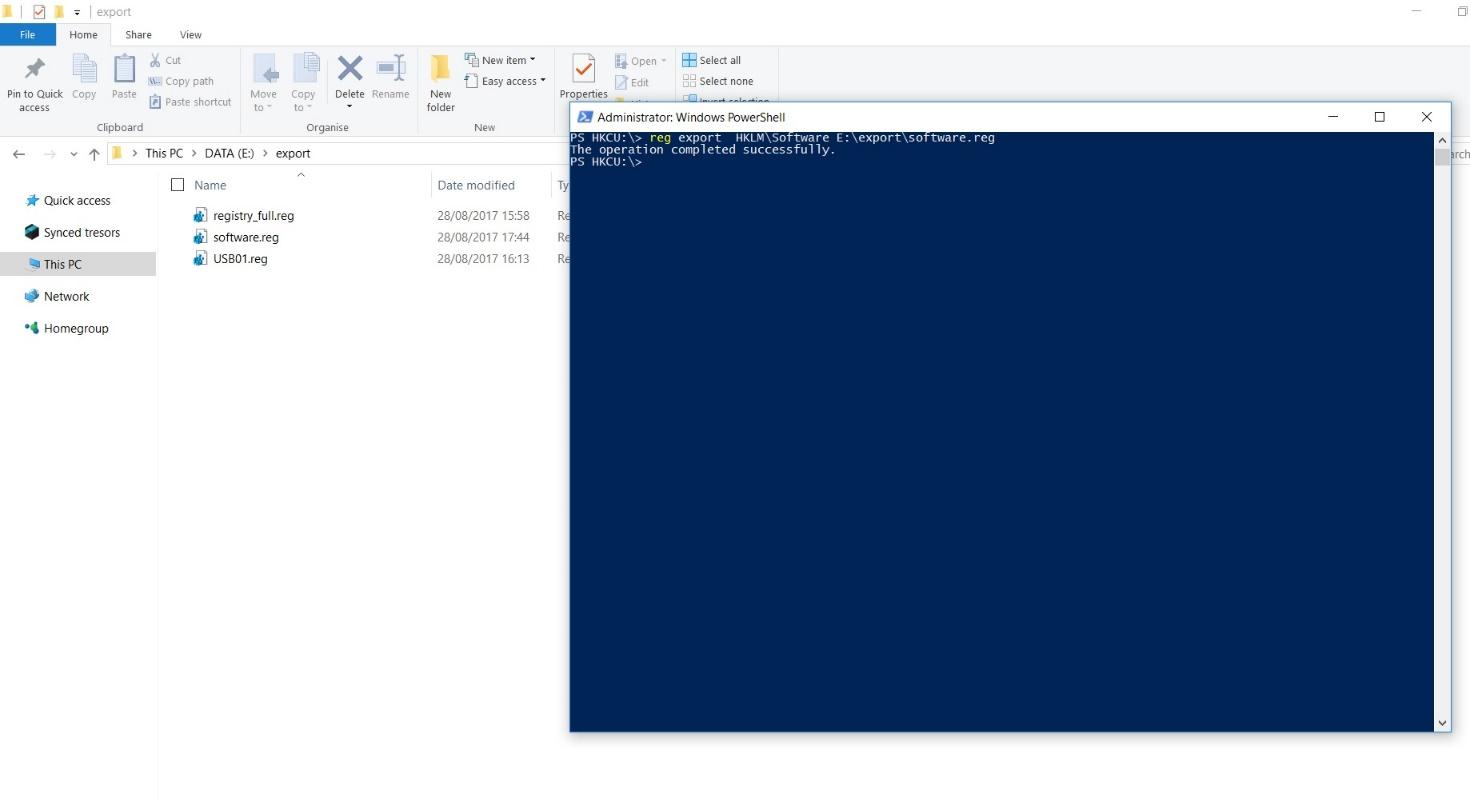
Figure 2.4.4
Both the previous procedures are useful to create a backup .reg file of the registry that you can import later in case of trouble and I really, really suggest you to make a backup every time you’re attempting to change something in the registry.
Using a more forensic approach, you can export registry hives using FTK Imager, a free tool by AccessData used mainly for forensics imaging and file-system analysis but, as we will see, very versatile and capable of extracting a mine of information from running systems or from forensic images.
To extract registry hives from a running system, you can copy on a USB drive the executable of FTK Imager Lite, a stand-alone version of the previous tool used to conduct forensics imaging with the least possible interaction with the running machines. This characteristic makes it great for acquisitions from server.
Then you must mount the flash drive into the machine and select File → Obtain Protected Files → Password recovery and all registry files.
Pay attention to the fact that this procedure can be used only to extract the registry from the machine you are working on, and not on forensic images or on remote machines.
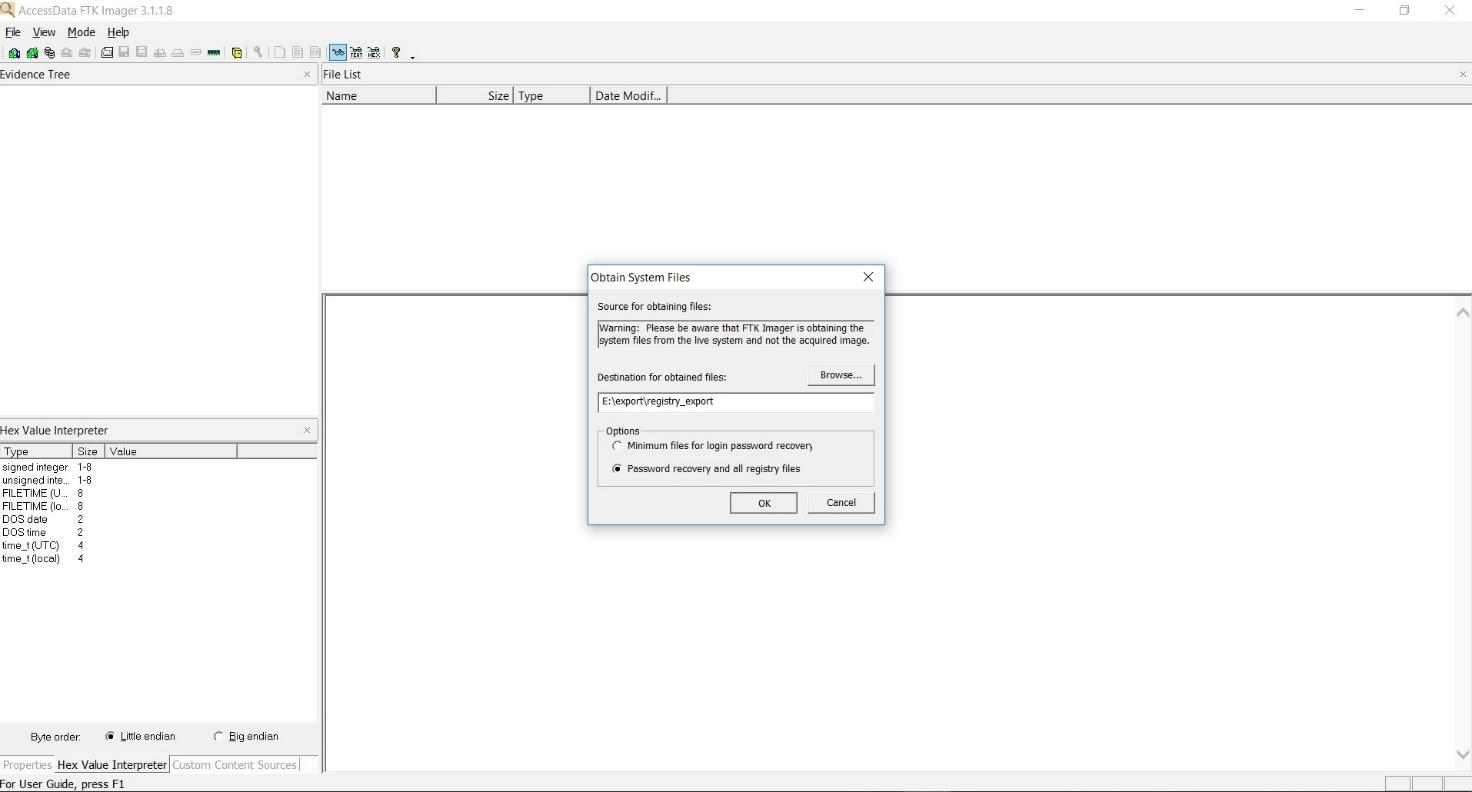
Figure 2.4.5
Finally, in the directory that you have chosen for the export, you will find six files (default, SAM, SECURITY, software, system, userdiff) and the folder Users.
| Default | HKEY_USERS\DEFAULT |
| SAM | HKEY_LOCALMACHINE\SAM |
| SECURITY | HKEY_LOCALMACHINE\SECURITY |
| Software | HKEY_LOCAL_MACHINE\SOFTWARE |
| System | HKEY_LOCAL_MACHINE\SYSTEM |
Inside the folder Users, we can find at least two folders, default and public, containing an NTUSER.DAT file, the one that stores all user's registry settings (HKEY_CURRENT_USER).
Working with a forensics image, you can follow the same steps with the image that you’ll have previously mounted as an Item on FTK Imager (or Imager Lite if you prefer).
To do this, you must launch FTK Imager and then click File→Add Evidence Item→Image file and then click on your image.
To extract Registry files you must search in the directory at the path %SystemRoot%\System32\Config, right-click on the file you need them and then select the export option.
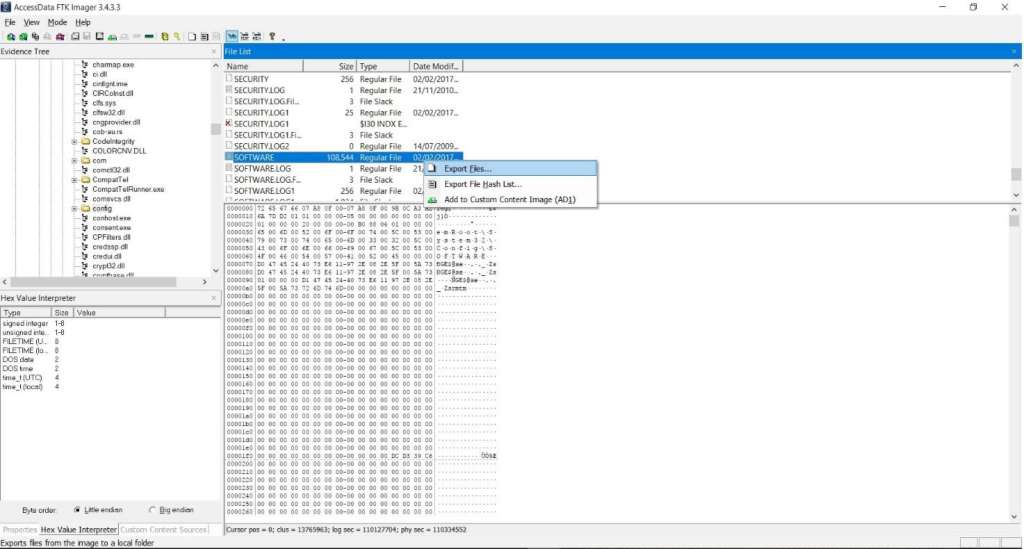
Figure 2.4.6
To extract the NTUSER.DAT file you must repeat the procedure inside the folder at the following path C:\Users\[USER] and then export the file related to the user’s account you’re interested in.
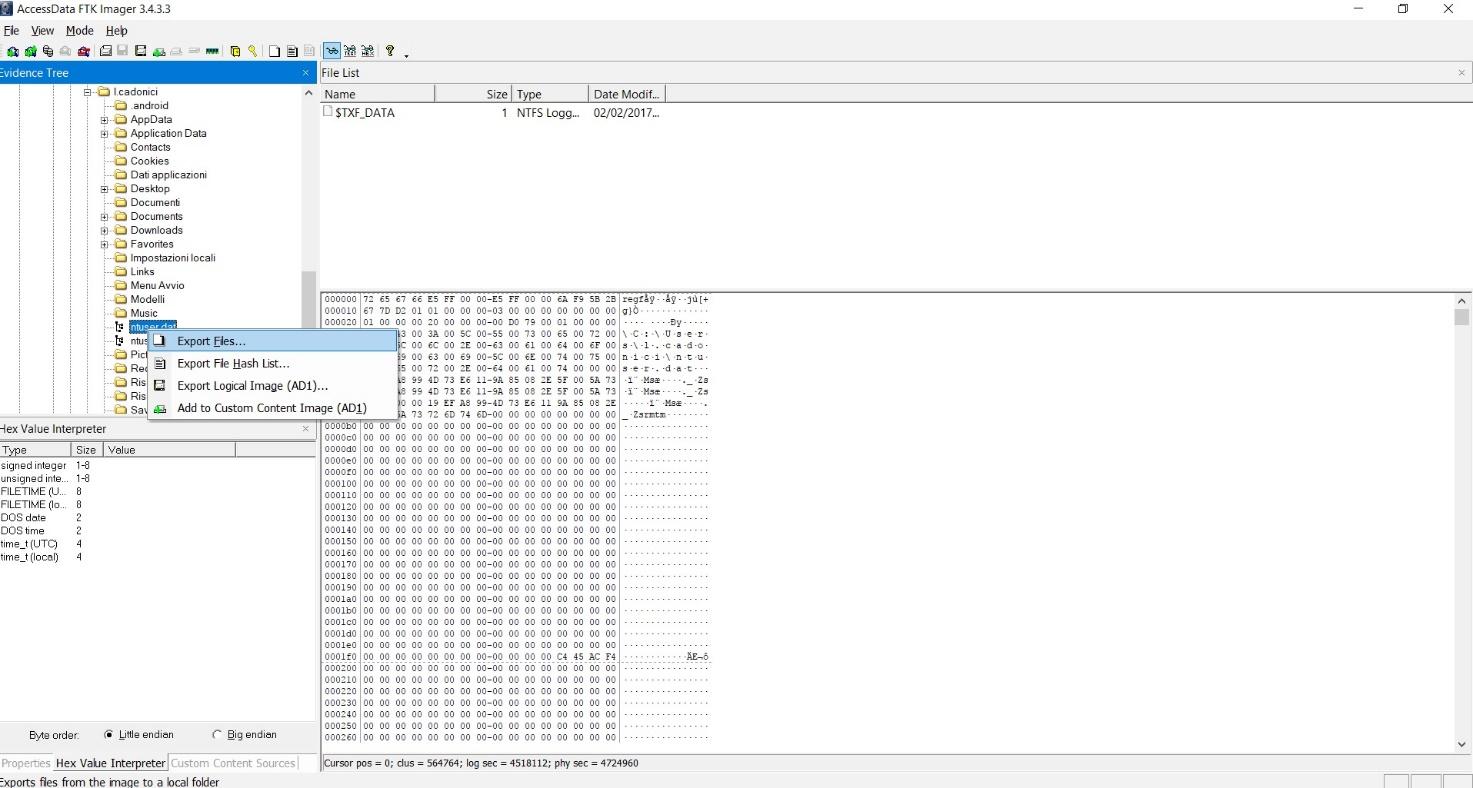
Figure 2.4.7
[custom-related-posts title="Related Posts" none_text="None found" order_by="title" order="ASC"]
Author
Latest Articles
 BlogApril 7, 2022Detecting Fake Images via Noise Analysis | Forensics Tutorial [FREE COURSE CONTENT]
 BlogMarch 2, 2022Windows File System | Windows Forensics Tutorial [FREE COURSE CONTENT]
 BlogAugust 17, 2021PowerShell in forensics - suitable cases [FREE COURSE CONTENT]
 OpenMay 20, 2021Photographic Evidence and Photographic Evidence Tampering
Subscribe
Login
0 Comments